
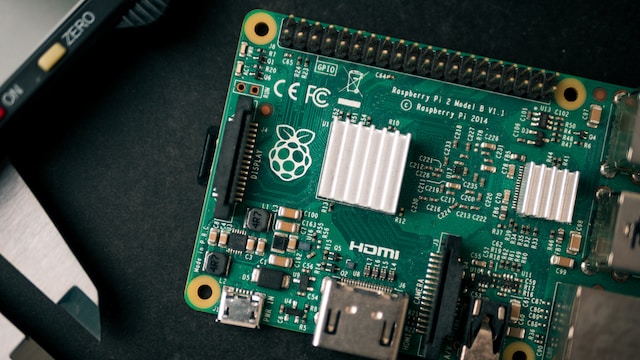
The Raspberry Pi has revolutionized the world of single-board computers, offering endless possibilities for hobbyists, enthusiasts, and professionals alike. One of the key features that makes a versatile tool is its ability to be accessed remotely through Secure Shell (SSH). By enabling SSH, you can effortlessly control from a remote location, saving you the hassle of connecting a monitor and keyboard directly to the device.
In this comprehensive guide, we will walk you through various methods to enable SSH. Whether you’re a novice setting up your Pi for the first time or an experienced user looking to streamline your workflow, we’ve got you covered. From flashing the OS (Raspbian) onto your micro SD card to connecting to your Pi via SSH, this article will equip you with the knowledge to unlock the full potential of your Raspberry Pi.
Flashing Raspberry Pi OS (Raspbian) onto your micro SD card
The first step towards enabling SSH is to ensure that (previously known as Raspbian) is installed on your micro SD card. This section will guide you through the process of flashing the operating system onto your card using the recommended tools and methods.
Before you begin, make sure you have the necessary items:
- Raspberry Pi: Ensure you have a compatible board, such as Raspberry Pi 4, Raspberry Pi 3, or Raspberry Pi Zero;
- Micro SD card: Choose a high-quality micro SD card with sufficient storage capacity (8GB or more is recommended) to accommodate the operating system and your files;
- SD card reader: You’ll need an SD card reader to connect the micro SD card to your computer;
- Computer: Prepare a computer running an operating system compatible with the OS flashing tools.
Now, let’s dive into the process of flashing the Ras. OS onto your micro SD card:
- Download Imager: Visit the official website (www.raspberrypi.org/downloads) and download the Imager tool suitable for your operating system;
- Install Imager: Once downloaded, run the installer and follow the on-screen instructions to install the Imager tool on your computer;
- Launch Imager: Open the Imager tool. You should see a user-friendly interface with various operating system options;
- Select OS: In the Imager, select the “Choose OS” option and navigate to the “OS (other)” section. Choose the version of OS you want to install. It’s recommended to use the latest stable release;
- Choose SD card: Insert your micro SD card into the SD card reader and connect it to your computer. In Imager, select the “Choose SD card” option and pick the appropriate drive corresponding to your micro SD card;
- Start the flashing process: Click on the “Write” button to initiate the flashing process. Imager will download the selected OS image and write it to your micro SD card. This process may take several minutes, depending on the speed of your SD card and internet connection;
- Eject the micro SD card: Once the flashing process is complete, safely eject the micro SD card from your computer.
Congratulations! You have successfully flashed the OS onto your micro SD card. Now, you’re ready to proceed with enabling SSH on your Raspberry Pi for remote access and control.
New feature: Enable SSH directly when you flash the SD card
In recent updates to the convenient feature has been introduced that allows you to enable SSH directly during the flashing process. This eliminates the need to manually enable SSH after flashing the SD card, saving you time and effort. Let’s explore how you can take advantage of this new feature:
- Launch Imager: Open the Imager tool on your computer;
- Select OS: Follow the same steps mentioned in Section 1 to choose the OS version you want to install and select the appropriate SD card;
- Enable SSH: After selecting the OS, you will notice an additional checkbox or toggle switch labeled “Enable SSH.” Check or toggle it to enable SSH directly during the flashing process.
Start the flashing process: Click on the “Write” button to initiate the flashing process, as described in Section 1. Imager will now not only install the operating system but also activate SSH automatically.
Eject the micro SD card: Once the flashing process is complete, safely eject the micro SD card from your computer.
With this new feature enabled, SSH will be automatically enabled on your Ras. when you boot it up for the first time. This means you can skip the step of manually enabling SSH in the Raspberry configuration settings or through other methods.
It’s important to note that when using this new feature, the default SSH credentials (username: “pi,” password: “raspberry”) will apply. It is highly recommended to change these default credentials for security reasons. You can do this by accessing the Raspberry configuration settings or using the command-line interface once you establish an SSH connection.
By leveraging this convenient new feature, you can streamline the setup process and have SSH readily available on your Raspberry right from the start. This makes remote access and control even more accessible, empowering you to take full advantage of the capabilities of your Raspberry.
Enable SSH on Raspberry Pi 4 with a monitor and keyboard
If you prefer a more traditional approach or don’t have access to the new feature mentioned earlier, you can still enable SSH on your Raspberry 4 by connecting a monitor and keyboard directly to the device. Follow these step-by-step instructions to activate SSH:
Connect the peripherals: Attach a HDMI cable to the HDMI port of your Raspberry 4 and connect the other end to a compatible monitor or TV. Then, plug in a USB keyboard to one of the USB ports on the Raspberry.
Power up the Raspberry: Connect the power supply to the Raspberry, and it will boot up.
Access the Raspberry Configuration Settings: Once the Raspberry has booted, you will see the Raspberry Desktop environment on the connected monitor. Click on the “Raspberry” icon in the top-left corner of the screen, navigate to “Preferences,” and select “Raspberry Pi Configuration” from the dropdown menu.
Enable SSH: In the Raspberry Configuration window, go to the “Interfaces” tab. Look for the “SSH” option and click the checkbox to enable it.
Save and exit: Click on the “OK” button to save the changes and exit the Raspberry Configuration window.
Reboot the Raspberry: It’s essential to reboot the Raspberry for the SSH changes to take effect. You can either click on the “Raspberry” icon and choose “Shutdown” from the menu, or open a terminal and type the command: sudo reboot.
Wait for the reboot: Allow the Raspberry to reboot fully. Once it’s ready, you can disconnect the monitor and keyboard from the Raspberry if desired.
Now, SSH is enabled on your Raspberry 4. You can proceed to connect to the via SSH using another computer on the same network. Refer to Section 5 for instructions on connecting to the Pi via SSH.
Enabling SSH through a monitor and keyboard setup provides a straightforward method to configure your Raspberry Pi for remote access. It’s particularly useful when you have physical access to the device and need to enable SSH quickly. Once SSH is enabled, you can disconnect the monitor and keyboard, and access your Raspberry Pi remotely using SSH, providing a more convenient and flexible means of controlling your device.
Find the Raspberry Pi’s IP address
Before you can establish an SSH connection to your Raspberry Pi, you need to determine its IP address on your local network. There are several methods to find the IP address of your Pi, and we will explore some of the most common ones:
- Router settings: Access your router’s administration interface by typing your router’s IP address into a web browser. Look for a section called “Connected Devices,” “DHCP Client List,” or similar. This will display a list of devices connected to your network, including your Raspberry Pi. Locate the entry that corresponds to your Pi and note down the IP address associated with it;
- Network scanning tools: Use network scanning tools such as Advanced IP Scanner (Windows), Angry IP Scanner (Windows, macOS, Linux), or Fing (iOS, Android). These tools scan your local network and provide a list of connected devices along with their IP addresses. Look for the entry that identifies your Raspberry Pi based on its manufacturer or hostname.
3. Command-line methods:
a. From a computer on the same network, open a terminal or command prompt:
– For Windows: Press the Windows key + R, type “cmd,” and press Enter.
– For macOS and Linux: Launch the Terminal application.
b. Type the following command and press Enter:
```

ping raspberrypi.local

```
This command attempts to ping a hostname called “raspberrypi.local,” which is the default hostname for a Raspberry Pi. If successful, it will display the IP address of your Pi.
c. If the previous method didn’t work, you can try using the `arp` command:
– For Windows: Type the following command and press Enter:
```

 arp -a

```
Look for an entry with “Raspberry Pi Foundation” or “Raspberry Pi” as the physical address (MAC address). The corresponding IP address is your Raspberry Pi’s IP address.
– For macOS and Linux: Type the following command and press Enter:
```

arp -a | grep b8:27:eb

```
This command filters the `arp -a` output to show only entries with the MAC address prefix “b8:27:eb,” which corresponds to Raspberry Pi devices. The IP address displayed is your Raspberry Pi’s IP address.
With the IP address in hand, you’re ready to establish an SSH connection to your Raspberry Pi. Refer to Section 5 for instructions on connecting to the Pi via SSH.
Finding the IP address of your Raspberry Pi allows you to establish a connection from another device on the same network. Whether you opt for router settings, network scanning tools, or command-line methods, locating the IP address is a crucial step in gaining remote access to your Pi.
Connect to the Pi via SSH
Now that you have enabled SSH on your Raspberry Pi and obtained its IP address, you can establish a remote connection to your Pi using SSH. Follow these steps to connect to your Pi via SSH:
1. Open a terminal or command prompt on your computer:
– For Windows: Press the Windows key + R, type “cmd,” and press Enter.
– For macOS and Linux: Launch the Terminal application.
2. Type the following command and replace “your_pi_ip_address” with the actual IP address of your Raspberry Pi:
```

ssh pi@your_pi_ip_address

```
This command establishes an SSH connection to your Pi using the default username “pi” and the IP address of your Pi. If prompted, enter the password associated with the “pi” user (by default, the password is “raspberry”).
**Note:** For security reasons, it is highly recommended to change the default password of the “pi” user. You can do this by running the command `passwd` once you are logged in.
3. If the connection is successful, you will be logged into your Raspberry Pi via SSH, and you will see a command-line interface (CLI) prompt.
Congratulations! You have successfully connected to your Raspberry Pi via SSH. You can now execute commands remotely and interact with your Pi as if you were using a local terminal. You have the flexibility to install software, configure settings, and manage your Raspberry Pi from the comfort of your own computer.
To disconnect from the SSH session and return to your local machine’s terminal or command prompt, simply type:
```

exit

```
Establishing an SSH connection is a powerful way to control your Raspberry Pi remotely. It allows you to execute commands, run scripts, transfer files, and manage your Pi’s functionalities without the need for a physical monitor, keyboard, or mouse connected directly to the device. Embrace the convenience and flexibility of SSH as you explore the vast capabilities of your Raspberry Pi.
Enable SSH on Raspberry Pi 4 without any monitor
If you don’t have a spare monitor or prefer a headless setup, you can still enable SSH on your Raspberry Pi 4 without the need for a physical monitor. This method allows you to configure SSH by modifying files on the micro SD card before booting up the Pi. Follow these steps to enable SSH without a monitor:
1. Flash the Raspberry Pi OS: Begin by flashing the Raspberry Pi OS onto your micro SD card using the steps outlined in Section 1. Make sure you have completed this step before proceeding.
2. Access the micro SD card: After flashing the OS, remove the micro SD card from your computer and insert it back into your computer’s SD card reader.
3. Enable SSH by modifying files: To enable SSH, you need to add an empty file named “ssh” to the root directory of the micro SD card. Here’s how:
a. Open the File Explorer (Windows) or Finder (macOS).
b. Locate the micro SD card drive and open it.
c. In the root directory of the micro SD card, right-click and select “New” > “Text Document” (Windows) or “New Folder” (macOS). Rename the file to “ssh” without any file extension.
d. Confirm the file name change and remove the “.txt” extension if applicable.
4. Eject the micro SD card: Safely eject the micro SD card from your computer.
5. Insert the micro SD card into the Raspberry Pi: Carefully insert the micro SD card into the micro SD card slot on your Raspberry Pi 4.
6. Power up the Raspberry Pi: Connect the power supply to the Raspberry Pi to boot it up.
7. Wait for the Raspberry Pi to boot: Give the Raspberry Pi a few moments to boot up and initialize the SSH service.
Now, SSH is enabled on your Raspberry Pi 4 without the need for a monitor. You can proceed to find the IP address of your Pi (refer to Section 4) and then connect to it via SSH using another computer on the same network (refer to Section 5).
Enabling SSH without a monitor offers a convenient method to access and control your Raspberry Pi remotely. By following these steps, you can set up SSH and establish a secure connection, even without a physical display connected to your Pi. Enjoy the flexibility of managing your Pi headlessly and unlock its full potential.
Connect to the Raspberry Pi 4 via SSH
Once SSH is enabled, we’ll guide you through connecting to your Raspberry Pi remotely. Learn how to securely log in to your Pi, execute commands, transfer files, and even set up passwordless authentication for a seamless and efficient SSH experience.
Section 8: Find the Raspberry Pi’s IP address
To ensure a smooth SSH connection, we’ll revisit methods for finding your Raspberry Pi’s IP address. Discover additional tools and techniques that can assist you in quickly locating the necessary information when needed.
Example Code and Table
To enhance your understanding and practical application, we’ll provide example code snippets and a helpful table showcasing common SSH commands and their functions. This invaluable resource will serve as a quick reference guide for your Raspberry Pi SSH endeavors.
Conclusion:
Enabling SSH on your Raspberry Pi is a game-changer, opening up a world of possibilities for remote access and control. By following the steps outlined in this guide, you can seamlessly configure SSH, regardless of your level of expertise. Empower your Raspberry Pi experience by harnessing the power of SSH, and unlock the true potential of this remarkable single-board computer.


Add comment