

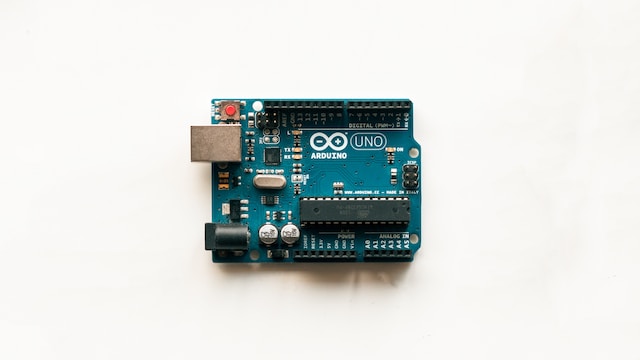
Are you ready to dive into the exciting world of Arduino programming? Whether you’re a beginner or an experienced enthusiast, understanding the fundamental concepts is essential for successfully bringing your projects to life. Arduino, an open-source electronics platform, provides a versatile and accessible way to create interactive projects and prototypes. Central to the Arduino programming paradigm are two crucial functions: void setup and void loop.
In this comprehensive guide, we will unravel the mysteries of void loop, an indispensable function in Arduino programming. We’ll explore its purpose, functionality, and best practices, allowing you to write efficient and powerful code that takes full advantage of the Arduino platform. Understanding how void loop works and how to optimize it is essential for creating projects that respond to inputs, interact with the environment, and execute tasks with precision.
Whether you’re building a home automation system, a robotic arm, or a weather station, mastering void loop will empower you to control and manipulate your Arduino projects effectively. By the end of this article, you’ll have a solid understanding of void loop and the knowledge to write well-structured, efficient code that brings your ideas to life.
Join us on this journey as we unlock the potential of void loop, delve into best practices, and provide practical examples to guide you along the way. So, let’s dive in and harness the power of void loop in your Arduino projects!
Void Setup and Void Loop: Mandatory Functions in Arduino
When working with Arduino, two core functions hold utmost importance: void setup and void loop. These functions are mandatory in every Arduino sketch and play distinct roles in the execution of your program.
1.1 Purpose of Void Setup:
The void setup function acts as the initialization routine, executed only once when the microcontroller starts. Its primary purpose is to perform any necessary setup tasks required for your project’s operation. Within this function, you define pin modes, configure communication protocols, initialize variables, and set initial states for components.
For example, if you’re using an LED connected to pin 13, you would set pin 13 as an output using the pinMode() function within the void setup:
cpp

void setup() {

  pinMode(13, OUTPUT);

}
You can also initialize libraries, establish serial communication, or set up interrupts within the void setup function. The code written inside void setup executes only once, ensuring that your project begins in a known and consistent state.
1.2 Purpose of Void Loop:
While void setup sets the initial conditions, it is the void loop function where the real action happens. The void loop function runs immediately after void setup completes its execution and continues to run indefinitely in an infinite loop. It forms the backbone of your Arduino program, controlling the behavior of your project.
Inside the void loop, you write the code that dictates how your Arduino interacts with its environment. It could be reading sensor values, monitoring inputs, controlling actuators, or executing a sequence of operations. Whatever the task, the code written within the void loop executes repeatedly, allowing your project to perform its intended functionality.
Here’s a simple example that turns an LED on and off continuously using the digitalWrite() function within the void loop:
cpp

void loop() {

  digitalWrite(13, HIGH);

  delay(1000);

  digitalWrite(13, LOW);

  delay(1000);

}
In this example, the LED connected to pin 13 is turned on for one second and then turned off for one second repeatedly. This creates a blinking effect.
It’s important to note that the void loop function should not contain any blocking operations that halt the execution of other tasks. Blocking code can lead to unresponsive projects, especially when you need to handle multiple inputs or perform concurrent actions. By keeping the code within void loop non-blocking, you ensure that the Arduino can multitask effectively and respond to events in a timely manner.
Understanding the distinct purposes of void setup and void loop is crucial for structuring your Arduino code effectively. In the following sections, we will explore the inner workings of these functions and provide best practices to optimize your Arduino programs.
How Void Setup and Void Loop Work
To understand the inner workings of void setup and void loop, let’s take a closer look at their structure and execution flow.
2.1 Execution Flow of Void Setup:
The void setup function is called automatically when the Arduino board is powered up or reset. It executes only once, and its primary purpose is to perform the necessary initialization tasks before the main program starts running.
When you upload a sketch to an Arduino board, the microcontroller first goes through a reset phase. During this phase, the bootloader prepares the board for code execution. Once the reset phase is complete, the microcontroller begins executing your program starting from the void setup function.
After the execution of void setup, the microcontroller moves on to the void loop function, which forms the main control loop of your Arduino program.
2.2 Execution Flow of Void Loop:
The void loop function runs immediately after void setup completes its execution. It is the heart of your Arduino program, responsible for continuously executing the code inside its block.
Once the void loop function finishes executing its block of code, it automatically goes back to the beginning and repeats the process. This looping behavior allows your Arduino project to perform tasks repeatedly, creating responsive and interactive behavior.
It’s essential to note that the execution of void loop happens at a very high speed, as Arduino boards are designed to operate with microsecond precision. This means that the code inside the void loop executes rapidly, creating the illusion of simultaneous operations and continuous behavior.
For instance, imagine you have a temperature sensor connected to your Arduino. In the void loop, you can read the sensor’s value, check if it exceeds a certain threshold, and trigger an action accordingly. This process happens continuously and rapidly, allowing your project to respond in real-time to changes in the sensor’s readings.
By leveraging the power of void loop, you can create Arduino projects that exhibit dynamic behavior, adaptability, and real-time responsiveness.
Understanding the execution flow of void setup and void loop is crucial for designing effective Arduino programs. In the following sections, we will explore best practices for writing code within these functions and delve into techniques to optimize their performance.
Writing Arduino Programs – Best Practices for Void Loop and Void Setup
Now that we understand the importance of void setup and void loop, let’s explore some best practices to optimize our code and make the most of these functions.
3.1 Keep Void Setup Clean and Concise:
One of the best practices in Arduino programming is to maintain a clean and concise void setup function. As your projects grow in complexity, it’s easy for the setup function to become cluttered with numerous initialization tasks. To ensure readability and modularity, consider breaking down your setup code into smaller functions.
For example, if your project involves initializing multiple sensors and actuators, you can create separate functions for each device and call them within the void setup. This approach not only improves code organization but also allows for easier maintenance and troubleshooting.
cpp

void setup() {

  initializeSensors();

  initializeActuators();

  // Additional setup tasks

}

void initializeSensors() {

  // Code to initialize sensors

}

void initializeActuators() {

  // Code to initialize actuators

}
By modularizing your setup code, you can focus on specific tasks within individual functions, making your code more manageable and reusable.
3.2 Avoid Blocking Code:
In Arduino programming, it’s important to avoid blocking code within the void loop function. Blocking code refers to operations that cause the microcontroller to wait until a certain task is complete before moving on to the next line of code. While a delay() function is a common example of blocking code, there are other scenarios where operations can halt the program’s execution.
Blocking code can lead to unresponsive projects, especially when you need to handle multiple inputs or perform concurrent actions. Instead, strive for non-blocking code by utilizing timing techniques such as the millis() function or interrupts.
The millis() function can be used to create timed events without blocking the execution of other code. By keeping track of the elapsed time, you can trigger actions or change states based on specific time intervals.
cpp

void loop() {

  unsigned long currentMillis = millis();

  if (currentMillis - previousMillis >= interval) {

    previousMillis = currentMillis;

    // Code to be executed at the specified interval

  }

  // Additional non-blocking code

}
By implementing non-blocking techniques, you allow your Arduino project to perform multiple tasks simultaneously, ensuring a smooth and responsive user experience.
3.3 Utilize Libraries and Functions:
Arduino boasts a vast library ecosystem, offering pre-built functions and libraries for various tasks. Leveraging these libraries can significantly simplify your code and reduce development time. Before reinventing the wheel, explore the Arduino library manager and online resources to find relevant libraries for your project.
For example, if you’re working with an LCD display, you can find libraries that provide functions for displaying text, graphics, and handling user input. Similarly, for sensor integration or communication protocols like I2C or SPI, there are libraries available that provide ready-to-use functions and abstractions.
However, when using libraries, be mindful of the memory footprint and compatibility with your specific Arduino board. Some libraries may consume a significant amount of memory, limiting the resources available for other parts of your project. Always read the documentation and consider the constraints of your hardware when selecting and utilizing libraries.
3.4 Implement Proper Timing:
Precise timing is crucial in many Arduino projects. Whether you’re controlling LEDs, monitoring sensor data at specific intervals, or synchronizing actions, timing plays a vital role. The Arduino platform offers various timing functions and techniques to achieve accurate timing in your projects.
For example, the delay() function is a simple way to introduce pauses in your program, but it can also cause blocking. Alternatively, you can use millis() or micros() functions to create timed events without blocking the execution of other code.
Additionally, you can utilize timers and interrupts to handle time-critical tasks. Interrupts allow you to respond to external events in real-time, making them useful for applications that require immediate action or precise timing.
Understanding and implementing proper timing techniques ensures that your Arduino projects operate smoothly, respond accurately to inputs, and maintain synchronization between different components.
By following these best practices for void setup and void loop, you can create well-structured and efficient Arduino programs. Now, let’s explore an example code snippet that showcases these practices in action.
Example Code and Table
cpp

// Libraries

#include <LiquidCrystal_I2C.h>

// Constants

const int ledPin = 13;

const int sensorPin = A0;

const int threshold = 500;

// Variables

unsigned long previousMillis = 0;

const long interval = 1000;

// LCD object

LiquidCrystal_I2C lcd(0x27, 16, 2);

// Function prototypes

void initializeComponents();

void setup() {

  initializeComponents();

}

void loop() {

  // Non-blocking code using timing

  unsigned long currentMillis = millis();

  if (currentMillis - previousMillis >= interval) {

    previousMillis = currentMillis;

    int sensorValue = analogRead(sensorPin);

    if (sensorValue > threshold) {

      digitalWrite(ledPin, HIGH);

      lcd.setCursor(0, 1);

      lcd.print("Triggered!");

      delay(500);

    } else {

      digitalWrite(ledPin, LOW);

      lcd.setCursor(0, 1);

      lcd.print("Ready       ");

    }

  }

  // Additional non-blocking code

}

void initializeComponents() {

  // Initialize LED pin

  pinMode(ledPin, OUTPUT);

  // Initialize LCD

  lcd.begin(16, 2);

  lcd.print("Arduino Project");

  lcd.setCursor(0, 1);

  lcd.print("Ready       ");

}
Table: Summary of void setup and void loop
| Function | Purpose |
|---|---|
| void setup | Initialization routine executed once at the start |
| void loop | Main control loop executed repeatedly after void setup |
In this example code, we initialize components and set pin modes within the void setup function. The void loop function then demonstrates non-blocking code using timing techniques. It continuously reads a sensor value and triggers actions based on a threshold, all while updating an LCD display. The code is modular, concise, and avoids blocking operations, ensuring smooth and responsive behavior.
Conclusion
In conclusion, void loop is an indispensable component of Arduino programming, allowing for the continuous execution of code and control over project behavior. By understanding the purpose and best practices for void loop and void setup, you can optimize your code, enhance performance, and create impressive Arduino projects. Remember to keep your code modular, avoid blocking operations, leverage libraries, and implement proper timing to achieve the desired results. Now armed with this knowledge, go forth and bring your Arduino projects to life with the power of void loop!


Add comment